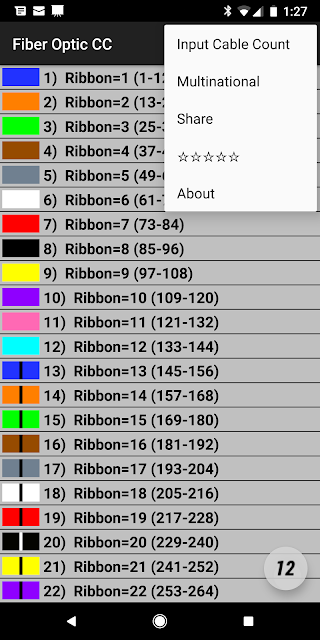
~Entering a feed count 'Cable 1'
1) Selecting 'Input Cable Count' from the top right menu dropdown of the main screen.
3) Now select the 'Cable 1' radio button that is located below the count input box.
4) From the 'Select # of Strand' drop down at the top of the screen, select 'RILT#1'. ('RILT#1' is just an example, you can select whatever cable type you really need.)
5) (With the drop down at the top set to ''RILT#1'' and the round buttons below the cable inputs set on 'Cable 1') You can go ahead and enter the cable count for cable 1.
6) Once you have the count all entered click the 'Color Code' button. ('Cable 1' is automatically saved by having selected the 'Cable 1' radio button when the 'Color Code' button is clicked.)
7) You will now have the Main Screen open for the 'Cable 1' count.
~We can make a second cable 'Cable 2' similarly by:
1) Selecting 'Input Cable Count' from the top right menu dropdown of the main screen.
2) We are now in the Cable count input screen. (Don't worry that it still shows 'Cable 1' count.)
3) Now select the 'Cable 2' radio button that is located below the count input box. ('Cable 1' count disappears.)
4) From the 'Select # of Strand' drop down at the top of the screen, select '12'. (12 is just an example, you can select whatever cable type you really need.)
5) (With the drop down at the top set to '12' and the round buttons below the cable inputs set on 'Cable 2') You can go ahead and enter the cable count for cable 2.
6) Once you have the count all entered click the 'Color Code' button.
(No image needed)
7) You will now have the Main Screen open for the 'Cable 2' count.
~To switch back to the RILT 'Cable 1' (Assuming it's already built and is working fine):
1) From the menu dropdown on the top right select 'Input Cable Count' again.
2) Then just select 'Cable 1' radio button below the cable count.
3) and click the 'Color Code' button.
(No image needed)
4) Now the main screen will show the RILT color code you previously entered with its cable count.
~Then to switch back to 'Cable 2' you just repeat the process. (No images needed)
1) Select 'Input Cable Count'
2) Select 'Cable 2' radio button
3) Click the 'Color Code' button


